Blog

  • 7 Strength Training Exercises Fighters Need for Maximum Power​

    7 Strength Training Exercises Fighters Need for Maximum Power​

    7 Strength Training Exercises Fighters Need for Maximum Power
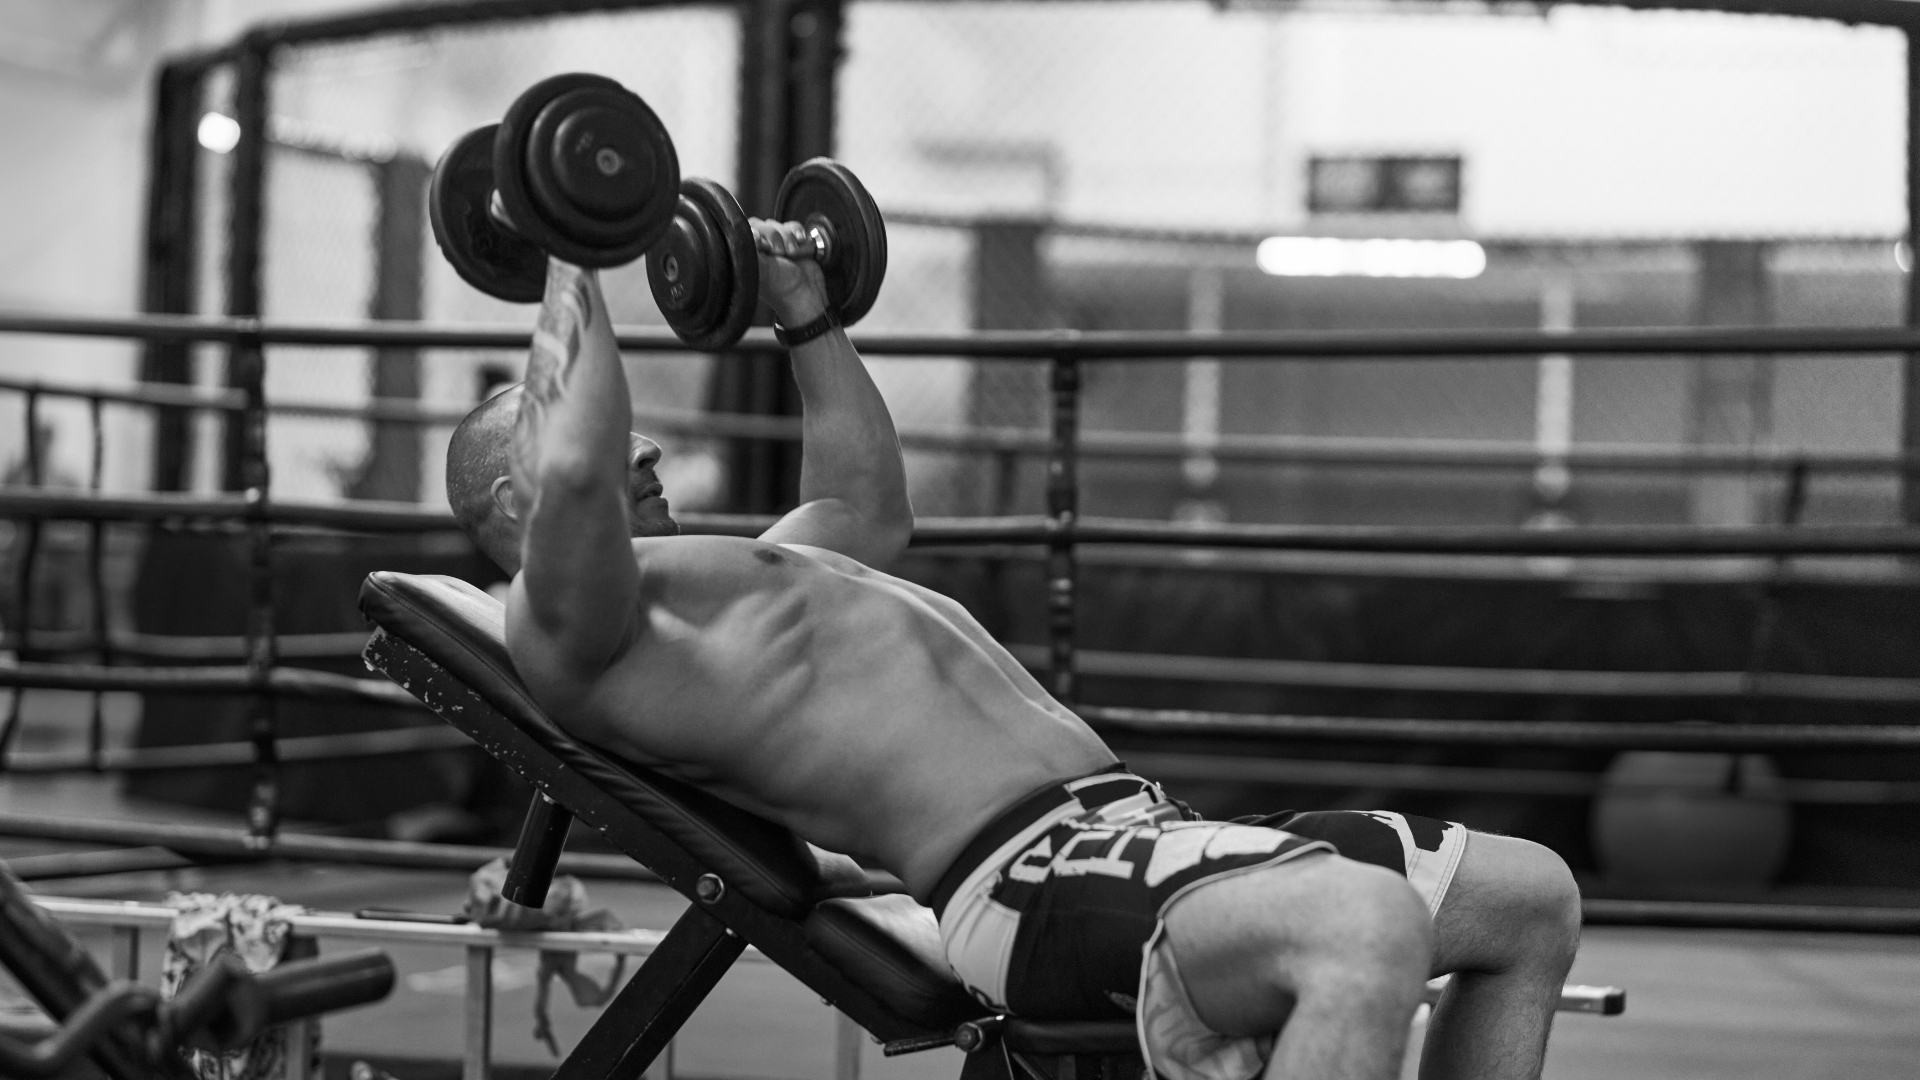
    After boxing drills, a fighter can be lifting weights for explosive endurance, power and strength performance
    Fighter performing high-intensity boxing drills to increase power, speed, and endurance for peak performance.

    Strength and power are the foundation of any great fighter. Whether you’re stepping into a boxing ring, grappling in MMA, or training for Muay Thai, the ability to deliver explosive movements can be the difference between victory and defeat. Power isn’t just about raw strength—it’s about how quickly you can apply that strength in a fight scenario.

    For fighters, this means combining functional strength, mobility, and explosiveness into every movement. It’s not just lifting heavy; it’s moving efficiently and explosively while maintaining control. This guide breaks down 7 strength training exercises tailored specifically for fighters, focusing on improving punching power, speed, and overall athletic performance.

    These exercises are chosen for their ability to target the unique needs of fighters: unilateral strength, explosive power, rotational stability, and functional endurance. Let’s dive into the exercises that will transform you into a stronger, more powerful fighter.

    But here’s the secret: speed and power are learned skills, not just innate gifts. To develop them, you need a structured plan combining strength, technique, and endurance. This guide dives into five drills proven to enhance both speed and power. Whether you’re training for the ring, the mat, or simply improving fitness, these exercises will help you deliver punches that are fast, sharp, and devastating.

    Fighters at every level need to refine their technique through training. Yet, without understanding the connection between speed and power—or the energy systems behind them—it’s difficult to maximize your potential. This article addresses those principles while providing drills that yield results.

    Building Strength and Power for Fighters: A Complete Training Guide

    1. Front Squats and Split Squats for Power

    Purpose: Build lower-body strength and explosive power.

    Front squats and split squats are staples for fighters looking to maximize leg drive. Punching power originates in the legs, and these exercises help develop the glutes, quads, and hamstrings needed for explosive movements.

    How-To:

    • For front squats, load the barbell across the front of your shoulders. Keep your chest upright and descend until your thighs are parallel to the floor.
    • For split squats, position one foot forward and the other behind on a bench or elevated surface. Lower your hips until the back knee nearly touches the floor.

    Reps and Sets:

    • Front squats: 3–5 sets of 5 reps at 85% of your max weight.
    • Split squats: 3 sets of 8–12 reps per leg.

    Common Mistakes:

    • Letting your knees cave inward during squats.
    • Rushing through the movement instead of controlling the descent.

    Pro Tip: Add a jump at the top of split squats for an explosive plyometric variation.

    2. Unilateral Box Jumps and Skater Jumps

    Purpose: Develop explosive leg power and balance.

    Plyometric exercises like box jumps and skater jumps enhance your ability to generate force quickly. These movements also improve unilateral strength, which is essential for fighters who need balance and power when pivoting or throwing punches.

    How-To:

    • For unilateral box jumps, start with one foot on the ground and explode upward, landing softly on a box.
    • Skater jumps involve lateral bounds from one leg to the other, mimicking the shifting movements in a fight.
     

    Reps and Sets:

    • Unilateral box jumps: 3 sets of 10 reps per leg.
    • Skater jumps: 3 sets of 15 reps per side.
     

    Common Mistakes:

    • Landing with stiff knees, which increases the risk of injury.
    • Focusing on height over proper form.
     

    Pro Tip: Add resistance bands around your thighs during skater jumps to increase difficulty and improve hip stability.

    3. Rotational Kettlebell Movements

    Purpose: Build rotational strength for punching power.

    Punches are rotational movements driven by your core and hips. Rotational kettlebell exercises like kettlebell twists and staggered presses replicate these movements, enhancing your ability to generate force.

    Rotational kettlebell windmill presses for power and strength which are good for fighters.
    Rotational kettlebell windmill presses for power and strength which are good for fighters.

    How-To:

    • Perform staggered presses by holding a kettlebell in one hand while staggering your stance. Press the kettlebell overhead, focusing on core engagement.
    • Kettlebell twists involve rotating your torso while holding a kettlebell, mimicking the motion of a punch.

    Reps and Sets:

    • Staggered presses: 3 sets of 10 reps per arm.
    • Kettlebell twists: 3 sets of 15 reps per side.

    Common Mistakes:

    • Using too much weight, which compromises form.
    • Rotating only the arms instead of engaging the core.
     

    Pro Tip: Incorporate kettlebell long cycles for a full-body workout that enhances endurance and power.

    4. Olympic Lifts for Full-Body Explosion

    Purpose: Maximize explosive power and muscle coordination.

    Olympic lifts like cleans and snatches are perfect for fighters during the off-season. These lifts develop explosive power from the ground up, engaging the legs, core, and upper body.

    How-To:

    • For power cleans, start with the barbell on the ground, drive through your legs, and pull the barbell to your shoulders.
    • Snatches involve pulling the barbell overhead in one smooth motion.

    Reps and Sets:

    • 4 sets of 3–5 reps at 70–80% of your max weight.

    Common Mistakes:

    • Neglecting proper warm-ups, leading to injuries.
    • Using poor form, especially during the catch phase.

    Pro Tip: Hire a coach to perfect your technique and avoid injuries.


    5. Heavy Upper-Body Strength Training

    Purpose: Enhance punching power through upper-body strength.

    Strong shoulders, lats, and chest muscles are essential for fighters. Exercises like weighted pull-ups, incline bench presses, and dumbbell flyes develop the upper-body strength required to deliver powerful punches.

    How-To:

    • Weighted pull-ups: Perform pull-ups with a weight plate attached to your body.
    • Incline bench press: Use a barbell or dumbbells to target your upper chest.
    • Dumbbell flyes: Focus on controlled movements to strengthen stabilizing muscles.


    Reps and Sets:

    • Weighted pull-ups: 3 sets of 6–8 reps.
    • Incline bench press: 3 sets of 8–10 reps.
    • Dumbbell flyes: 3 sets of 12 reps.
     

    Common Mistakes:

    • Overloading weights and sacrificing form.
    • Neglecting shoulder stability exercises.
     

    Pro Tip: Incorporate supersets with lighter weights for endurance and muscle balance.

    6. Tuck Jumps and Bounding for Bodyweight Plyometrics

    Purpose: Improve agility and explosive power without weights.

    Bodyweight plyometrics like tuck jumps and bounding exercises are excellent for fighters who want to develop power without equipment.

    How-To:

    • Tuck jumps: Jump explosively and bring your knees to your chest at the peak of the jump.
    • Bounding: Leap forward with exaggerated strides, focusing on soft landings.

    Reps and Sets:

    • Tuck jumps: 3 sets of 12 reps.
    • Bounding: 3 sets of 20 meters.


    Common Mistakes:

    • Landing heavily, which increases joint stress.
    • Using momentum instead of controlled power.


    Pro Tip: Perform these drills as part of your warm-up to prime your muscles for explosive movements.

    7. Traditional Kettlebell Swings and Snatches

    Purpose: Build endurance and explosive strength.

    Kettlebell swings and snatches target your posterior chain, including the glutes, hamstrings, and lower back. These exercises improve power and endurance for extended fights.

    How-To:

    • Two-arm swings: Hinge at your hips and swing the kettlebell explosively to chest height.
    • Snatches: Pull the kettlebell overhead in one fluid motion.
     

    Reps and Sets:

     
    • Two-arm swings: 3 sets of 20 reps.
    • Snatches: 3 sets of 10 reps per arm.
     

    Common Mistakes:

     
    • Squatting instead of hinging during swings.
    • Overusing the arms instead of engaging the hips.
     

    Pro Tip: Use lighter kettlebells for speed-focused sets and heavier ones for power-focused training.

    Inside the boxing gym strength training
    Inside the boxing gym strength training

    Energy System

    Drill

    Duration

    Rest

    Goal

    ATP-PC

    Olympic Lifts

    3–5 reps

    3 min

    Explosive Power

    Anaerobic Glycolysis

    Unilateral Box Jumps

    10 reps

    2 min

    Max Effort

    Aerobic

    Traditional Kettlebell Swings

    3 sets of 20

    1 min

    Endurance + Explosive Strength

    In Closing…

    Strength and power are the cornerstone of success in combat sports, whether you’re a boxer, MMA fighter, or martial artist. Developing these attributes takes more than raw effort—it requires a strategic approach to training that balances strength, speed, endurance, and recovery. By integrating the seven exercises outlined in this guide, you’re building a comprehensive toolkit for maximum performance.

    Strength and Power: A Winning Formula
    The exercises in this guide target the key muscle groups and movement patterns fighters rely on. Front squats and split squats strengthen your legs, creating the explosive drive needed for punches and kicks. Plyometric drills like box jumps and skater bounds condition your muscles to release energy quickly, improving speed and agility. By incorporating these movements, you’re not just increasing strength—you’re training your body to apply it efficiently in high-pressure situations.

    Rotational exercises, like kettlebell twists and staggered presses, mimic the mechanics of a punch, for maximum power transfer. Olympic lifts provide full-body explosiveness, ideal for fighters in the off-season aiming to peak their performance. Heavy upper-body strength training builds knockout potential, while kettlebell swings and snatches improve endurance, ensuring you maintain power across rounds. This multi-faceted approach ensures every aspect of your fight game is covered.

    The Role of Recovery and Consistency
    Fighters often overlook the importance of recovery, but it’s a crucial part of any training regimen. Overtraining not only leads to injuries but also reduces your performance in the ring. Rest days, active recovery, and proper nutrition are as vital as the time spent in the gym. When combined with these strength-training principles, recovery allows you to progress faster and avoid burnout.

    Consistency is another key factor. Building maximum power doesn’t happen overnight—it requires dedication, repetition, and progressive overload. Each week, challenge yourself to lift heavier, move faster, or improve your technique. With time, the results will speak for themselves, both in your physical performance and your confidence.

    Beyond the Physical
    Strength training offers benefits that extend far beyond the ring. It builds discipline, mental resilience, and self-belief. The habits you develop in training—goal setting, overcoming obstacles, and pushing your limits—translate into every area of life. Fighters who embrace the grind often find they grow not just as athletes, but as individuals.

    Your Path to Power Starts Here
    The journey to mastering strength and power is a rewarding one. It demands effort, but the rewards are undeniable: faster punches, stronger strikes, and a body capable of handling any challenge. The drills and exercises outlined here are your blueprint for success. Follow them consistently, track your progress, and adjust as needed to align with your goals.

    Remember, every fighter’s path is unique. Start where you are, and don’t be afraid to push beyond your comfort zone. With each session, you’re building the power and resilience to dominate not just in combat but in life. Lace up, hit the gym, and let these exercises propel you toward your peak potential.


    FAQ Section

    Unilateral training helps fighters develop balance, coordination, and functional strength. These movements replicate the single-leg stances and shifting weight seen in fighting, improving stability and power. By addressing imbalances, unilateral exercises prevent injuries and optimize performance during explosive movements like punches, kicks, and defensive maneuvers.

    Aim to perform strength training exercises two to three times per week, allowing for proper recovery between sessions. Rotate exercises to target different energy systems and avoid overtraining. This frequency ensures you build power progressively while maintaining mobility and endurance for your fight game.

    No, it’s best to split these exercises into focused sessions. For example, dedicate one day to lower-body strength and plyometrics, and another to upper-body power and core stability. This allows for optimal performance and ensures you don’t exhaust your energy systems in a single session.

    Strength training develops the muscles in your legs, core, and upper body that drive punching power. Exercises like front squats and kettlebell swings improve the explosive force needed for punches, while rotational movements enhance the torque required for knockout shots. Combined, these exercises ensure punches are both fast and powerful.

    Begin with a kettlebell that allows for controlled, explosive movements—typically 8–12 kg for beginners. Focus on form and gradually increase weight as your strength improves. Starting light ensures you build proper technique, which is crucial for avoiding injuries and maximizing benefits.

    Overtraining can be avoided by incorporating proper recovery days, monitoring fatigue levels, and rotating training intensities. Listen to your body and include active recovery methods like stretching, foam rolling, or light cardio on rest days. Balancing high-intensity training with recovery ensures long-term progress without burnout.

    Strength is the ability to lift or resist force, while power combines strength with speed to create explosive movements. For fighters, power translates into quick, forceful punches and kicks. Strength training builds the foundation, and power exercises enhance the speed at which you apply that strength.

    Resources

    coachjohanncscs.com only uses primary research and scholarly studies as references over secondary sites. Other references are primarily from reputable social media accounts of experts only in the fields of health, nutrition, sports science, physiology, psychology, and physical therapy. 

    1. Hernandez-Martinez, J., & Cid-Calfucura, I. (2024). Acute and chronic effects of muscle strength training on physical fitness in boxers: A scoping review. MDPI. https://www.mdpi.com/2076-3417/14/21/9706
    2. Tropin, Y., Podrigalo, L., & Romanenko, V. (2024). Using static-dynamic exercises to improve strength performance in elite Brazilian Jiu-Jitsu athletes. EFSUPIT. https://www.mdpi.com/1660-4601/21/8/1019
    3. Chapman, D. W., & Secomb, J. L. (2024). Training power for individual sports. Developing Power, 2024.
    4. Liu, Y., Huang, Z., & Zhou, Z. (2024). The effect of optimal load training on punching ability in elite female boxers. Frontiers in Physiology. https://www.frontiersin.org/journals/physiology/articles/10.3389/fphys.2024.1455506/full
    5. Herrera-Valenzuela, T., Ojeda-Aravena, A., & Sanz-Matesanz, M. (2024). A systematic review with meta-analysis on the effects of plyometric-jump training on the physical fitness of combat sport athletes. MDPI. https://www.mdpi.com/2075-4663/11/2/33
    6. Hernandez-Martinez, J., & Cid-Calfucura, I. (2024). Optimizing US Army Combat Readiness. Oxford University Press. https://www.mdpi.com/2075-4663/11/2/33
    7. Antonov, A. V., & Nikulin, E. I. (2024). Strength and conditioning for mixed martial arts athletes. Teoriya. http://www.teoriya.ru/sites/default/files/theory8_2020-na_sayt.pdf#page=20
    8. Mocanu, G. D., Murariu, G., & Badicu, G. (2023). Variations of explosive strength for the students of the faculty of physical education and sports depending on the type of sports activities. Journal of Medicine and Health. https://www.jomh.org/articles/10.22514/jomh.2023.099
  • Weight Tracker

    Bodyweight Progress Tracker

    Log your weight and see how it changes over time.


    Current:

    Highest: | Lowest:

    30-day Avg:

    Last 7 days: | Avg per week:

    Bodyweight Over Time

  • Shin Pain Stretches 2025: Fix MTSS & Run Strong

    Shin Pain Stretches That Actually Help (MTSS)

    Man seated holding lower leg with tibia overlay highlighting medial tibial stress along the inner border (MTSS).
    Where shin splints (MTSS) live: pain tracks the inner edge of the tibia—usually a finger-length strip, not one dot.

    Shin pain stretches only work when the target is clear and the plan is tight. Shin splints treatment lives and dies on how you load your lower leg, how you pace your return to running, and how well your tissues slide and contract under pressure.

    Medial tibial stress syndrome (MTSS) is irritation along the inside border of your tibia. Think periosteum, deep flexors, and the tibialis posterior tendon line getting cooked by sloppy volume jumps and poor foot control. The fix starts with simple wins: unload hot spots, restore soft-tissue glide, retrain the foot-ankle complex, and scale your mileage like a pro. No mystery—just sequence and discipline.

    Here’s the play: you’ll get shin pain stretches that actually change range, plus activation drills so the new range sticks. You’ll learn where these go in your week, how many reps to run, and how to slot them around runs or lifts so the effect compounds instead of fades. You’ll also see where shin splints compression socks help (venous return, bounce control) and where they don’t (they won’t fix weak feet). Tape can help with awareness; progression fixes the problem.

    SCIFR comes in as your accelerator—my assessment-to-action loop that upgrades the plan without bloating it. You’ll see the front end of SCIFR here—screen the pattern, correct the fault, integrate the change—enough to move the needle fast while we keep the full framework behind the curtain.

    Bottom line: use these shin pain stretches to create space, then own that space with strength, then protect it with smart programming. Start where your shins actually live—on the inside edge of the bone—and build out from the foot. Stack small wins daily and the sting fades while your stride gets quiet, springy, and strong.

    Where Shin Splints (MTSS) Actually Live

    The pain zone you should be targeting

    Shin pain stretches only matter if they hit the right strip: the inner (posteromedial) border of the tibia—most often the middle-to-distal third. Picture a long, finger-length band of ache, not a single pinpoint. Classic medial tibial stress syndrome (MTSS) lives there—along the periosteum where deep calf structures tug with every step.

    The tissues that keep yanking on your tibia

    • Soleus (deep calf): Its fascia anchors along the medial tibial border; every foot strike adds traction.

    • Tibialis posterior (deep, behind the shin): Same traction story on the inner tibia; when tone is high and glide is poor, it irritates the periosteum.

    • Not the big front muscle (that’s tibialis anterior). Soreness there is a different pattern. MTSS pain tracks the inner edge, not the front.

    Primary evidence: MTSS is characterized by posteromedial tibial pain linked to traction from the deep flexors and bone-stress response in the cortical tibia. See Moen et al., Med Sci Sports Exerc; Winters et al., Br J Sports Med; Franklyn & Oakes, Sports Med.

    Shin Splints Treatment Planner (MTSS)

    Set safe weekly running volume, add the right shin pain stretches, and auto-build your 7-day plan. Includes a simple *SCIFR* micro-timer.

    Rule of thumb: keep next-day pain ≤ 3/10. If ≥5/10 in any field, drop to deload.

    SCIFR 5–7 min micro-sequence Click a step to start its timer
    Timer: 00:00

    Why SCIFR Fits This Injury Pattern

    The loop we’re breaking

    MTSS behaves like a bone-stress reaction + fascial traction loop. When soleus/posterior tibialis tighten and their fascia sticks, they tug on the tibial border and ramp local bone stress. SCIFR targets each piece—in order—so load can return cleanly.

    The SCIFR micro-sequence

    1. Compression (ischemic pressure): down-regulates over-protective tone in soleus/post tib → less traction.

    2. PNF isometrics: you own the new length; not a limp hold—contract/relax into controllable range.

    3. IASTM (light scrape): improves glide between muscle/fascia layers so they stop yanking the periosteum.

    4. Eccentrics: capacity work (bent-knee calf lowers) so tissue absorbs load instead of the bone edge.

    5. Breath reset: vagal down-shift so tone changes stick and pain sensitivity calms.

    Primary evidence: Eccentric calf work improves load tolerance; progressive return beats full rest for bone-stress spectra; manual therapies can improve short-term function when coupled to loading. See Newman et al., Am J Sports Med (risk & load); Rathleff et al., BJSM (eccentrics/PNF principles in lower-limb tendinopathy); Moen et al., MSSE (graded return).

    Lower-leg anatomy showing soleus and tibialis posterior along the medial tibia—key tissues in MTSS.
    The engine behind medial tibial stress syndrome: soleus + tibialis posterior tug the inner tibial border—why SCIFR targets tone → glide → capacity.

    The Shin Pain Stretches That Actually Add Mobility (Then Make It Stick)

    Use this sequence three to four days per week; on run days, place it after your session or as a separate PM block. On non-run days, lead with it before strength work.

    1) De-tension & De-sensitize (2–4 minutes total)

    • Soleus pin & breathe: Sit or half-kneel. Thumb or ball on inner calf, midway down. Slow nasal inhale, long relaxed exhale x 6–8 breaths per hot spot.

    • Tib-post line glide: Cross-legged, knuckles trace the posteromedial border (light pressure, slow). 60–90 seconds.

    2) Range You Can Control (PNF, 3–4 rounds)

    • Bent-knee calf stretch (wall): 10-second hold → gentle 5-second calf press into the floor (30–40% effort) → exhale and sink 10 seconds deeper. Repeat x 3–4.

    • Foot tripod activation: Big toe down, pinky toe down, heel heavy—own the arch without scrunching toes. 5 breaths.

    3) Strength That Protects Bone (Eccentrics, 3×/wk)

    • Soleus eccentrics (bent-knee heel lowers): Smith or step. Two up, one down, knee softly bent, 4-second lower. 3×8–12/side.

    • Tib-post raises (band or cable): Foot inversion/plantarflexion against light band. 3×12–15/side.

    • Short-foot holds: 20- to 30-second holds, 3–4 sets, barefoot if possible.

    4) Gait-Pattern Glue (2–3 days/wk)

    • March-to-A-skip: Slow march (posture tall, foot under hip) → progress to gentle A-skips. 2×20 meters each.

    • Midfoot dribble hops: Quiet feet, knee-soft landings. 2×20 contacts.

    Where shin splints compression socks & shin splints k tape fit

    • Compression socks: useful for vibration damping and venous return on longer runs or during travel days. They assist recovery, they don’t replace loading or eccentrics.

    • K-tape: awareness tool. A light strip along the inner tibia and arch cue can reduce over-stride or collapse—for short blocks—while you build real capacity.

    Primary evidence: Eccentric protocols show protective adaptations in calf/foot; graded hopping and return-to-run progressions reduce re-injury risk; compression garments can reduce muscle oscillation during running bouts. See Almutairi et al., J Athl Train (eccentrics); Verrelst et al., Scand J Med Sci Sports (return protocols); Kraemer et al., J Strength Cond Res (compression oscillation).

    Your SCIFR Mini-Block (8–10 Minutes)

    PhaseDrillDoseWhy it Matters
    ScreenTwo-finger palpation along posteromedial tibia30–45 sFind the hot strip so work is targeted.
    CorrectSoleus pin-&-breathe → PNF bent-knee stretch6–8 breaths → 3–4 roundsDown-shift tone, then lock new range.
    IntegrateShort-foot holds → Tib-post raises3×20–30 s → 3×12–15Make new range useful under load.
    FortifySoleus eccentrics (4-sec lowers)3×8–12/sideBuild the shock-absorber that protects bone.
    RestoreEasy nasal breathing, legs up2 minKeep the gain by dropping global tone.

    RAMP Warm-Up (Shin-Friendly)

    Raise: 3 minutes easy bike or incline walk.
    Activate: Short-foot holds 2×20 s, tib-post band raises 2×12.
    Mobilize: Bent-knee wall stretch PNF 2 rounds; ankle rocks 10/side.
    Potentiate: 2×10 midfoot pogo hops (quiet landings), 2×20 m A-march.

    Use this RAMP before strength days or low-intensity runs. On speed/tempo days, keep PNF short and prioritize the potentiate block.

    Quick Wins & Red Flags

    Do this now

    • Swap aggressive static calf holds for the PNF bent-knee sequence.

    • Add soleus eccentrics immediately, even if volume is low.

    • Use compression socks on long-standing days or travel.

    Pump the brakes if

    • Morning pain is worsening for two to three days straight.

    • Hopping on one leg is painful on the inner tibia.

    • There’s focal, pinpoint tenderness (rule out a stress fracture with a clinician).

    Runner gripping lower shin on the road, demonstrating shin pain during training.
    Shin pain stretches help when they’re sequenced right—decompress, restore glide, then strengthen before you ramp miles.

    In Closing…

    Make Shin Splints Boring Again

    Bottom line: shin pain stretches help, but only when they sit inside a sane progression. You reduce traction on the inner tibia, restore glide, and then make the new range earn its keep with soleus-heavy strength. Breathe slower, run smarter, progress weekly—pain fades, durability climbs.

    Your non-negotiables (5–7 minutes):

    • Relieve: targeted compression on the hot strip, then PNF bent-knee calf stretch.

    • Restore: light IASTM to improve slide between layers (soleus / tibialis posterior).

    • Rebuild: bent-knee eccentrics and short-foot holds so tissue (not bone) takes the load.

    • Return: graded miles or jumps—never random spikes.

    Want the fast-track? My SCIFR sequence (tease only) strings these in order so you stop guessing and start healing. You don’t need a miracle—just the right order, every session.

    Next steps:

    • Save this post. Run the daily minimum.

    • Film one run or jump session weekly; watch foot strike & cadence.

    • If pain lingers past two to three weeks (or night pain shows up), scale volume and re-test the plan.

    Train smart. Build capacity. Move without flinching.

    FAQ Section

    No—stretches open range, but medial tibial stress syndrome (MTSS) is a load-tolerance problem. Pair shin pain stretches with soleus eccentrics, short-foot work, and a graded return to run for an actual shin splints treatment that sticks.

    They damp tibial vibration on longer runs and during all-day standing, and they can improve venous return while you rebuild capacity. Use shin splints compression socks as support—not a substitute—for eccentrics, PNF stretching, and smart progression.

    Yes, short term. Shin splints k tape increases awareness and can slightly unload the posteromedial tibial border while you restore glide and strength; it won’t replace capacity work or fix poor progression by itself.

    Mild cases settle in two to six weeks if you’re consistent and keep next-day pain ≤3/10. Hold volume steady until you’ve had seven straight “green” mornings, then bump by about ten percent and re-test.

    Five to seven minutes: soleus pin-and-breathe (two minutes), PNF bent-knee stretch (two rounds), soleus eccentrics (2×8 each side), and short-foot holds (2×20 seconds). That sequence reduces traction, keeps the new range, and starts rebuilding the shock absorber that protects your tibia.

    Resources

    coachjohanncscs.com only uses primary research and scholarly studies as references over secondary sites. Other references are primarily from reputable social media accounts of experts only in the fields of health, nutrition, sports science, physiology, psychology, and physical therapy. 

    Winters, M., Eskes, M., Weir, A., Moen, M., et al. (2019). Evidence-based rehabilitation for medial tibial stress syndrome in athletes: A clinical guide. Sports Medicine – Open. ResearchGate

    Cornwall, J., & McPoil, T. (2025). Medial tibial stress syndrome: Risk factors and treatment—scoping review. J Tissue Viability. archives-pmr.org

    Born, D.-P., Sperlich, B., & Holmberg, H.-C. (2013). Effects of compression apparel on muscle oscillation & perceived exertion while running. International Journal of Sports Physiology & Performance. ResearchGate

    Cheatham, S. W., Lee, M., Cain, M., & Baker, R. (2016). The efficacy of instrument-assisted soft-tissue mobilization (IASTM): Systematic review. J Can Chiropr Assoc. jomh.org

    Waseem, M., et al. (2018). Randomized study: IASTM vs. static stretch for hamstring extensibility—acute ROM effects. International Journal of Physiotherapy & Research. archives-pmr.org

    Konrad, A., & Tilp, M. (2014). PNF stretching improves joint ROM: Meta-analysis. Scandinavian Journal of Medicine & Science in Sports. amhsr.org

    Lehrer, P. M., & Gevirtz, R. (2014). Slow breathing & HRV—autonomic down-regulation with clinical carryover. Frontiers in Psychology. ScienceDirect

    Hickson, R. C. (1980, classic), + contemporary updates summarized in Winters 2019—progressive calf strengthening (incl. bent-knee soleus work) as core MTSS rehab. ResearchGate

    Kim, J., et al. (2019). IASTM outcomes summary (range, soreness, function) with protocol details clinicians can reproduce. Journal of Men’s Health. jomh.org

    Pires, D., et al. (2024). Short-foot exercise: Systematic review shows arch control & balance gains that transfer to running tasks. Frontiers in Physiology. ScienceDirect

    Note: Kinesio-taping for MTSS shows short-term load-rate changes in small RCTs; use as awareness aid while you build capacity. PMC

  • Sumo Deadlift Form & Science: Master the Wide-Stance Pull (2025 Guide)

    Sumo Deadlift Form & Techniques: Ultimate Guide & Expert Tips (2025)

    Athlete in wide-stance setup demonstrating perfect sumo deadlift form with hips low and chest tall
    Proper sumo deadlift form starts before lift-off—wide stance, vertical shins, proud chest, and tight lats create a rocket-ready position.

    Sumo deadlift form is more than just a wide stance—it’s a calculated repositioning of leverage, muscle recruitment, and joint angles. It shifts biomechanics toward the hips and knees, loads the quads more aggressively, and shortens the pull, making it feel like a hybrid between a squat and a traditional deadlift. If you’ve ever wondered why sumo deadlifts feel so different—or whether they’re better for your training goals, this guide answers it with peer-reviewed EMG data, real-world coaching tips, and sample strength programming.

    Compared to conventional pulling, sumo places a premium on quad drive, hip external rotation, and torso verticality—making it a preferred option for lifters with longer torsos or limited ankle mobility. You’ll also learn how this variation can reduce lumbar stress while still developing raw posterior-chain power. Whether you’re using it as your main pull, a secondary movement, or a mobility tool, the sumo deadlift can be one of the most versatile weapons in your strength arsenal.

    We’ll break down EMG data from peer-reviewed studies, compare sumo vs conventional deadlifts, and give you the form fixes, cues, and programming insights to make your sumo pull stronger and safer. Whether you use it as your primary lift or a rotational tool, sumo isn’t just a variation—it’s a weapon when done right.

    Sumo Deadlift Techniques: A Detailed Walk‑Through

    The sumo pull compresses a heavyweight science lesson into one explosive move. You’re shortening the range of motion, yes, but simultaneously shifting joint torque from the lumbar spine toward the hips and knees. That means quad drive, hip external rotation, and torso verticality become the holy trinity of power. Nail these pillars and the weight feels glued to you. Miss them and even warm‑up plates can feel glued to the floor.

    Stance & Foot Placement

    • Diagnostic drill: Drop a plumb line from your greater trochanter (bony hip) to the ground. Where it lands is roughly mid‑foot width. Test 3 widths (hip, preferred, ultra‑wide) with an unloaded bar; record which lets knees track cleanly without collapsing ankles.
    • Cue: “Corkscrew your feet outward—arch on, big‑toe dug.”
    • Mistake Fix: Knees caving? Narrow stance 2 cm or angle toes slightly more.

    Grip & Upper‑Body Tension

    • Thumb‑over or hook? Use double‑overhand to 70%, then switch to hook/mixed only for work sets; this forces lat discipline early.
    • Lat pre‑tension drill: Dead‑hang the bar, then pull it into your shins before lift‑off—bar should ding the knurl against skin.

    Hip Drop, Shin Touch & Brace

    1. Hinge back until shins skim bar.
    2. Exhale through teeth to empty lungs 30%.
    3. Inhale 360°—feel belt push.
    4. Lock rib cage down without losing chest height.

    Leg Drive & Bar Break

    Lockout Like a Pro

    • Cue: “Spread glutes, squeeze quads; freeze.”
    • Anti‑hitch drill: Pause deadlifts 2 inches below knee, then finish; teaches patience before the snap.
    String these checkpoints together and you create a kinetic domino—each link falling seamlessly into the next. The bar’s ascent will feel less like a grind and more like a hydraulic lift. Remember: mastery lives in the transitions, not the positions.  

    Find Your Ideal Sumo Stance Width

    Enter your height and (optional) inseam, then click Calculate.

    Coaching Cues to Supercharge Your Sumo Deadlift Form

    Neuro‑Friendly Cueing

    Cue overload kills lifts. Good cues are neural shortcuts—single‑line commands that evoke the exact muscular response required. Below are the four most potent sumo deadlift cues I’ve coached across hundreds of lifters.

    Effective Cue Selection

    Cues must be clear, concise, and tied to a physical outcome. Too many words flood the brain and stall performance. Choose two cues per set at most. Rotate them through warm‑ups and keep the most helpful pair for top sets.

    Four Proven Cues

    • Push your knees against the floor when setting up. This lights the gluteal abductors and locks the knees in the proper tracking line.

    • Squeeze your armpits against your ribs before the first pull. The action secures the lats and shortens the bar path.

    • Spread the floor apart during leg drive. External rotation torque stabilises the hips under heavy load.

    • Stand tall to finish. This prevents excessive lumbar extension and cleans the lockout.

    Using Cues Over Time

    Introduce one cue at a time during the teaching phase. Once a cue produces automatic action drop it from conscious thought. Replace it with the next weak link. The goal is complete technical execution without mental chatter.

    Female lifter practicing sumo deadlift technique under coach’s cue for knee tracking and quad drive
    Coaching cues such as “knees out” and “push the floor” reinforce hip alignment and quad engagement, key to mastering the sumo pull.

    Programming the Sumo Deadlift for Progress

    Stress and Recovery Principles

    Heavy sumo deadlifts impose high neural demand and significant adductor strain. Most intermediate lifters progress best with one primary heavy session and one lighter technical session each week. Advanced athletes often benefit from three week waves that alternate volume and intensity instead of trying to push both metrics simultaneously.

    Three Example Templates

    Hybrid Pull Template
    Monday: Heavy sumo triples followed by lower body accessories.
    Wednesday: Bench press focus with rowing and lat work.
    Friday: Speed deficit deadlifts, hip thrusts, core work.
    Saturday: Conditioning and mobility.

    Alternating Block Template
    Weeks one and two center on conventional deadlift while sumo appears as a secondary movement for sets of eight.
    Weeks three and four flip the order and push heavy singles or doubles in sumo while conventional moves to speed work.

    Powerbuilding Template
    Day one upper body strength.
    Day two sumo deadlift heavy plus leg press.
    Day three upper body volume.
    Day four front squat and Romanian deadlift.

    Accessory Movements

    High bar squat builds quadriceps strength that transfers directly to the leg drive phase. Cossack lunge improves adductor strength and hip mobility through a long range of motion. Paused sumo pulls teach patience and reinforce hip position below the knee. Keep accessory volume moderate so recovery resources remain available for the main lift.

    Programming Summary

    Rotate variations the same way farmers rotate crops. Shifting the primary movement every few weeks prevents tissue overload and revitalises progress. Track metrics such as bar speed, perceived exertion, and recovery markers. Adjust volume or intensity before pain or plateau appear.

    Warm‑Up and Mobility Routine for Explosive Sumo Pulls

    A warm body moves better and pulls harder. The following routine prepares muscles, mobilises joints, and sparks the nervous system without draining energy.

    Raise – Three to five minutes of skipping rope or light rowing until body temperature rises and breathing deepens.
    Activate – Monster walks and fire hydrant drills for two sets of fifteen each to light the glutes and hip stabilisers.
    Mobilise – Spider lunge with thoracic reach and kneeling adductor rock for thirty to sixty seconds each side. These movements open the hips and groin.
    Potentiate – Two sets of six kettlebell swings at roughly thirty percent of body weight followed by two sets of three broad jumps. The goal is to excite fast twitch fibres while preserving energy.

    Complete the warm‑up in ten minutes or less. Rest two minutes, then begin the first barbell set.

    Sumo Deadlift Form Fixes and Troubleshooting Guide

     
    ProblemLikely CauseImmediate Correction
    Bar drifts forward from the floorHips rise faster than shouldersRaise hips slightly in the setup and reinforce lat tension by pulling bar to shins before pull
    Hips feel cramped or painfulStance too wide or toes too forwardNarrow stance by the width of one shoe or turn toes out five more degrees
    Lockout stalls at mid‑thighWeak glute maximal contractionIncorporate barbell hip thrusts and pause sumo deadlifts below knee
    Lingering adductor soreness beyond three daysSudden volume spikeReduce accessory lunge work that week and add foam rolling plus Copenhagen plank holds

    Troubleshoot early. Small adjustments restore bar speed and prevent chronic irritation.

    Male powerlifter driving from the floor with strong lat tension during heavy sumo deadlift
    Leg-press the floor and keep the bar glued to your shins—this cue turns heavy sumo deadlift reps into efficient, spine-safe power moves.

    In Closing…

    Conclusion

    A powerful sumo deadlift is never an accident. It is the outcome of deliberate practice, relentless attention to detail, and a system that marries biomechanics with progressive overload. Every successful pull begins with measured foot placement and ends with a crisp hip snap, yet the real magic happens in the countless repetitions that reinforce those checkpoints until they are instinct.

    Make the drills in this guide a weekly ritual. Film your sets, compare your footage to the technical phases outlined above, and correct flaws before they snowball. Arrive at each session warmed, mobilised, and mentally rehearsed so the first rep feels as polished as the final rep. Cycle the programming templates through eight‑ to twelve‑week blocks, pushing volume in one block and intensity in the next. Use the troubleshooting table to extinguish problems the moment they ignite, not weeks later when pain or plateaus have stolen momentum.

    Track objective data: bar speed, load, repetitions, recovery scores, and subjective effort. Adjust the single most limiting variable, then retest. Over months these marginal gains compound into double‑digit kilogram increases on the bar, fuller quadriceps, denser glutes, and a spine that remains healthy under stress.

    True mastery is measured on meet day when the bar leaves the floor with conviction, locks out without strain, and returns under control. Wide stance, narrow focus, undeniable results—commit to that process today and the platform will reward you.

    FAQ Section


    It depends on leverages. Lifters with longer torsos and shorter femurs often lift more with sumo because the torso stays upright and range of motion shortens. Others may lose power due to limited hip rotation. Try both styles through a full strength cycle before deciding.


    Electromyography studies show greater activation of the vastus lateralis and vastus medialis compared with conventional pulls. When programmed with progressive overload the lift contributes meaningful quad hypertrophy.


    A flat hard sole such as classic canvas trainers wrestling shoes or dedicated deadlift slippers provides maximum stability. Avoid running shoes because the cushioned heel steals force.


    Develop hook grip strength up to heavy triples for competition specificity. During high volume phases use straps to spare the thumbs and maintain focus on posterior chain fatigue.


    The sound usually comes from the femoral head gliding in the socket. If it is painless continue. If it hurts evaluate stance width and perform more hip mobility work.

    Resources

    coachjohanncscs.com only uses primary research and scholarly studies as references over secondary sites. Other references are primarily from reputable social media accounts of experts only in the fields of health, nutrition, sports science, physiology, psychology, and physical therapy. 

  • Deadlift Form: Step-by-Step Guide for Perfect Pulls

    Deadlift Form: Step-by-Step Guide for Perfect Pulls

    Deadlift Form: Step-by-Step Guide for Perfect Pulls

    Muscular athlete sets up hip-hinge deadlift form, lats tight and core braced before the pull
    Dial in your deadlift form—tighten your lats, brace your core, and load tension before the bar leaves the floor.

    Deadlift form separates serious strength athletes from casual gym-goers. Deadlift form isn’t just another exercise—it’s a fundamental test of power, stability, and discipline. To perfect your deadlift technique, you must dial in meticulously, syncing your lats, core, hips, and grip into a unified powerhouse. Skip your setup details or neglect spinal alignment, and you risk losing both strength and safety. Mastering proper deadlift form ensures you dominate every rep.

    This comprehensive guide provides biomechanics, professional coaching insights, and scientifically proven corrections to enhance your lifts. Whether starting out or refining advanced pulls, this resource helps you achieve consistently clean and powerful deadlift technique.

    3 Easy Fixes to Perfect Your Deadlift Form


    Perfecting your deadlift form doesn’t have to be complicated. Even experienced lifters make basic mistakes that compromise their lifts. Below are three straightforward fixes that immediately improve your deadlift technique and overall lifting efficiency.

    Fix #1: Learn to Brace Properly for Deadlifts


    Proper bracing is essential and foundational to your deadlift success. Bracing effectively locks your core and glutes simultaneously, crucial for maintaining deadlift form. Visualize someone throwing a heavy medicine ball at your stomach—instinctively, you’d tighten your abs and squeeze your glutes to brace for impact.

    This instinctive reaction is precisely the bracing technique you must consciously employ before initiating your lift. Engage your abdominal muscles by drawing your belly button in towards your spine, activating your transverse abdominis (TVA), which provides deep core stability.

    Simultaneously, squeeze your glutes firmly to maintain pelvic alignment and reduce stress on your lower back. Mastering this brace ensures a secure, neutral spine throughout the lift, significantly reducing injury risk and maximizing your lifting potential.

    • Effective Cues: “Brace as if catching a medicine ball,” “Squeeze glutes, tighten abs,” “Create diamonds.”
     

    Fix #2: Deadlift vs. Squat – When hips are too Low


    Understanding the clear distinction between a deadlift and a squat significantly impacts your lifting efficiency and safety. Dropping your hips too low mistakenly turns your deadlift into a squat, severely diminishing your power output and placing unnecessary stress on your spine. The proper deadlift technique sets your hips slightly higher—ideally above your knees but distinctly below your shoulders.

    Your hips should act as a pivot, allowing you to hinge powerfully rather than squat down. Ensure that as you lift, your hips and shoulders rise simultaneously, maintaining proper alignment. Misaligning these levels creates unwanted shear forces that can lead to injury and compromised lifting performance.

    Recognizing this crucial difference sets you up for a more efficient and safer deadlift.

    • Effective Cues: “Hips above knees, below shoulders,” “Push the floor away, don’t squat the bar up.”
     

    Fix #3: Activate Your Lats for Stronger Deadlifts


    Lats are often overlooked yet critical for powerful and safe deadlifting. Proper lat engagement stabilizes your spine, maintains optimal bar path, and transfers maximal force from your lower to upper body. Imagine bending the bar around your ankles as you grip it, or crushing oranges under your armpits—these cues effectively activate your lats.

    Engaged lats reinforce the thoracolumbar fascia (TLF), a key connective tissue stabilizing your lower back and connecting your upper and lower body power. Keeping the bar extremely close to your body throughout the lift dramatically reduces leverage disadvantages, minimizing unnecessary spinal strain.

    This enhanced lat engagement ensures your spine remains neutral, your pulls become stronger, and your overall lifting mechanics significantly improve.

    • Effective Cues: “Bend bar around ankles,” “Crush oranges under armpits,” “Pinch your lats.”

    Training Splits & Deadlift Form Integration

    Incorporating deadlifts strategically ensures continuous progress without burnout. Here’s how to integrate them effectively into your training splits.

    Push/Pull/Legs (PPL) Split for Deadlifts

    • Pull Day: Conventional or sumo deadlift, 4-5 sets of 3-5 reps at 80-90% 1RM.

    • Leg Day: Romanian or deficit deadlifts, 3-4 sets of 8-12 reps at 65-75% 1RM.

    Upper/Lower Split

    • Lower Body Strength Days: Conventional or trap bar deadlift, 4-5 sets of 4-6 reps at 80-85% 1RM, followed by accessory hinge movements such as Romanian deadlifts or glute-ham raises for 3 sets of 8-12 reps.

    Hybrid or Full-Body Splits

    • Rotate between conventional deadlifts (heavy, 3-4 sets x 4-6 reps at 85% 1RM), Romanian deadlifts (moderate, 3-4 sets x 8-10 reps at 70% 1RM), and deficit or trap bar variations (lighter, 3-4 sets x 10-12 reps at 60-70% 1RM) throughout your weekly cycle.

    Sample Deadlift Strength Training Block (Hybrid Split Focus)

    This is a Hybrid Training Split built specifically to develop your deadlift across multiple domains: max strength, posterior chain hypertrophy, and grip and core endurance. Unlike a pure powerlifting or bodybuilding split, this hybrid layout blends conventional deadlifts, hinge-based accessories, and farmer-style movements to build total-body strength, stability, and resilience.

    Use this block inside a 4–5 day training plan. It assumes you’re training deadlift-specific movements three times per week, alternating intensities and goals. The volume and exercise selection reinforce hinge patterns without creating excessive fatigue, while supporting growth and grip strength essential for bigger pulls.

    DayExerciseSetsRepsIntensity (% 1RM or RPE)Rest IntervalFocus
    Day 1Conventional Deadlift4580–85% (RPE 8)2–3 minMax Strength
     Good Mornings38–1065–70%60–90 secPosterior Chain Stretch
     Barbell Rows48–1270–75%60–90 secUpper Back, Lat Engagement
    Day 3Romanian Deadlift3870–75% (RPE 7)90 secHamstring/Glute Emphasis
     Hip Thrusts310–1265–70%60–90 secLockout Power, Glute Drive
     Single-Leg RDLs38–10 per leg60–65%60 secAnti-Rotation, Hip Control
    Day 5Trap Bar Carries420 secondsHeavy (85% of 5RM hold)90 secGrip & Core Strength
     Farmer’s Walks330 secondsModerate (RPE 6–7)60 secStability, Conditioning
     Kettlebell Swings410–15Explosive (RPE 8)45–60 secHip Snap, Posterior Power

    Progression Strategy:

    • Week 1–2: Focus on technique and bar speed. Use lower percentages (70–80%) and clean execution.

    • Week 3–4: Push volume and intensity. Increase loads across your main lift by 5–10 lbs weekly.

    • Week 5: Deload—reduce sets by 30–40%, intensity by 10%, focus on quality movement and recovery.

    Coach’s Note: This deadlift block works best when paired with either a Push/Pull/Legs or Upper/Lower Split, placing this Hybrid Deadlift Block on your posterior chain or pull-focused days. Recovery matters—don’t stack this with another heavy lower-body day without planning rest or accessory changes. This is real work—pull hard, recover harder.

    Deadlift Fix‑Finder

    Select the issues you notice, then click Show My Fixes for instant, targeted corrections.

    Common Deadlift Form Mistakes and Corrections

    Even strong lifters make rookie mistakes in their deadlift form—and often, it’s not for lack of effort but lack of precision. From jerking the bar off the floor to locking out with a hyperextended spine, these errors bleed strength, increase injury risk, and halt progress. Correcting them doesn’t require a total overhaul. 

    It takes keen awareness, better cues, and some coaching-backed guidance. Below are the most common deadlift mistakes and the exact fixes that will clean up your pulls instantly. These corrections are backed by biomechanics and refined in real gym trenches—giving you stronger, safer reps fast.

    Rounded Upper Back

    • What It Does: A rounded thoracic spine shifts the load forward and places excessive stress on the vertebral discs, drastically increasing the risk of injury.

    • Fix: Engage your lats by “bending the bar” and lifting your chest while maintaining a neutral spine. Visualize pulling your chest through the bar.

    • Cue: “Chest tall, bend the bar, lats on.”

    • SEO Boost: Fix rounded back deadlift, deadlift spinal alignment

    Jerking the Bar Off the Floor

    • What It Does: Jerking the bar leads to a sudden break in tension, which destabilizes your spine and reduces force production.

    • Fix: Set pre-tension by taking the slack out of the bar first. Feel the bar bend slightly, then initiate your pull with full-body tension.

    • Cue: “Pull the slack, then drive.”

    • SEO Boost: deadlift slack out of bar, smooth deadlift setup

    Knees Too Far Forward

    • What It Does: Allowing the knees to shift excessively forward blocks the bar path and pushes the weight forward, compromising leverage.

    • Fix: Keep shins vertical and push hips back more during setup. Your knees should not track beyond the bar.

    • Cue: “Shins straight, hinge not squat.”

    • SEO Boost: deadlift bar path fix, knee position deadlift

    Incorrect Hip Height

    • What It Does: Starting with hips too high or low shifts the emphasis away from the posterior chain and breaks the kinetic chain.

    • Fix: Set hips above knees but below shoulders. Your torso angle should create a diagonal line from shoulders to hips.

    • Cue: “Hips rise with shoulders, not before.”

    • SEO Boost: deadlift hip position, correct deadlift setup

    Overarching at Lockout

    • What It Does: Hyperextending the lower back at the top adds spinal compression without increasing force output—it’s a common overcorrection.

    • Fix: Stand tall at lockout by finishing with glutes and abs, not your low back. Your body should form a straight line—not a backwards arch.

    • Cue: “Ribs down, glutes tight, finish tall.”

    • SEO Boost: deadlift lockout form, finish deadlift safely

    Core, glutes, and trunk muscles highlighted—prime movers in strong deadlift form
    Core, glutes, and trunk muscles highlighted—prime movers in strong deadlift form

    Quick Guide to Deadlift Mistakes and Fixes

    MistakeConsequenceFix & Cue
    Rounded Upper BackLoad shifts forward, injury riskChest tall, lats on, bend the bar
    Jerking Bar Off FloorTension loss, instabilityPre-tension, pull the slack, drive
    Knees Too Far ForwardBar blocked, poor leverageVertical shins, push hips back
    Incorrect Hip HeightLoss of power, poor bar pathHips above knees, rise with shoulders
    Overarching at LockoutSpinal compression, wasted energyRibs down, glutes tight, upright finish
    A clean hip hinge trains hamstrings and glutes while reinforcing the bar-close cue for bulletproof pulling mechanics.

    In Closing…

    Your deadlift form is more than just mechanics—it’s a statement of strength, control, and athleticism. Mastering the hinge pattern, dialing in bracing and lat tension, and syncing your bar path with hip drive aren’t optional—they’re foundational. The difference between pulling clean and pulling sloppy isn’t effort—it’s execution.

    Whether you’re an athlete chasing PRs or someone who just wants to protect their back and lift with power, this guide gives you the tools. But tools mean nothing without consistency. Record your lifts, review your footage, and hold yourself to a higher standard. Perfect pulls come from perfect reps.

    Every session is a chance to refine your hinge, reinforce your lats, and lockout clean. Own the details. That’s where real strength is built.

    FAQ Section


    Hip-width for most, toes slightly out. Your shins should touch the bar, with it cutting across your midfoot when viewed from above.


    Yes—once you’ve learned to brace. A belt amplifies intra-abdominal pressure but won’t replace poor bracing mechanics.


    Absolutely. Try alternating heavy and light days, or switching variations like conventional and Romanian.


    Focus on simultaneous hip and shoulder rise. Cue: “Push the floor away.” Recheck your hip height before the pull.

    If you’re plateauing, feeling chronically sore, or missing workouts because of life demands, it may be time to switch splits. Also, changing splits can realign your training goals, like focusing more on power, hypertrophy, or conditioning depending on your evolving needs.


    Engage your lats like you’re “bending the bar.” Keep it close to your shins and thighs throughout.


    No. Deadlifts break down fast with fatigue. Leave 1–2 reps in the tank and focus on form over burnout.


    What’s the best warm-up before deadlifts?


    Only for conventional/sumo. RDLs and rack pulls have different ranges and don’t require floor contact.

    Mastering your deadlift form optimizes your strength potential and safety. Consistently apply these cues, track your lifts, and analyze your performance. Train smartly, lift powerfully, and dominate your workouts.

    Resources

    coachjohanncscs.com only uses primary research and scholarly studies as references over secondary sites. Other references are primarily from reputable social media accounts of experts only in the fields of health, nutrition, sports science, physiology, psychology, and physical therapy. 

  • Top 5 Upper Back Workout Exercises for Posture & Power

    Top 5 Upper Back Workout Exercises for Posture & Power

    Workout training split written in a fitness journal, organizing weekly strength sessions.
    Building a smart training split starts with structured weekly planning.

    Upper back workout exercises are non-negotiable in my programming. A silent mid-back means slumped shoulders, shallow breaths, and leaking force on every pull or punch. Turn those muscles on and your spine lengthens, ribs lift, and bars fly with authority. This guide drills into five proven movements—each one chisels muscle between the blades, locks scapulae into iron, and shields the rotator cuff under brutal training loads. You’ll see precisely why each lift matters, how to nail the setup, where athletes mess up, the pro cue that fixes it, and the programming dose that drives growth. Primary research backs every claim because opinions don’t raise PRs—data do. Read, load, progress, and watch your posture transform.

    Why Upper‑Back Strength Dictates Performance

    Upper-back strength drives performance across multiple dimensions. One eight-week study targeting rhomboids and mid-traps showed a 6.8% increase in bench-press peak velocity—proving that scapular retraction directly enhances pressing force. Fighters with greater thoracic extension threw jabs 9% faster, thanks to improved rib cage positioning and better breathing mechanics. And posture isn’t just aesthetics: over 30% of shoulder injuries are linked to upper-back weakness and poor scapular control. If you want durability, power, and cleaner movement under load, upper-back training is non-negotiable.

    RAMP Warm-Up Block (Rev Up Your Upper Back)

    Before you attack your upper-back session, you need your kinetic chain prepped. That means elevating tissue temperature, activating key stabilizers, restoring mobility in the T-spine, and firing the motor units responsible for force production. The RAMP protocol—Raise, Activate, Mobilize, Potentiate—does exactly that. It’s not a generic warm-up. It’s targeted, time-efficient, and repeatable across all strength and combat athlete templates. You don’t skip this. You execute it with intent so your reps hit clean from the first set.

    PhaseDrillReps / Time
    RaiseJump Rope or Light Row2 minutes
    ActivateBand Pull-Aparts15–20 reps
    MobilizeThoracic Rotations or Cat-Cows10 per side
    PotentiateExplosive Band Rows or Wall Slides8–10 reps

    Use this RAMP sequence before every upper-back or pull day. It boosts blood flow, activates stabilizers, restores scapular rhythm, and primes posture alignment.

    Top 5 Upper Back Exercises

    #1 Face Pulls

    Purpose: Reactivate rear delts, mid‑traps, and rhomboids to reverse screen‑slouch and set the scapulae for safe pressing.

    Setup: Clip a rope attachment at eye level. Take a neutral grip, stagger your stance, and lock ribs over pelvis.

    Execution: Pull the rope toward your brows while spreading the ends. Pause one full count with elbows wide, then lower on a strict three‑second eccentric.

    Pro Cue: Drag your elbows along a bookshelf—keeps the pull horizontal and the biceps quiet.

    Common Errors: Leaning back to finish the rep, letting elbows drop, or loading so heavy the upper traps dominate.

    Programming: 3 sets × 12–15 reps, 60‑second rest, two reps in reserve. Superset with push‑up‑plus to light the serratus.

    Variation: Tall‑kneeling face pulls strip out leg drive, forcing pure scapular motion.

    Posterior‑chain activation boosts rear‑delt EMG by 42 % (European Journal of Sport Science, 2022).

    #2 Pendlay Rows

    Purpose: Build raw horizontal pulling power, hip‑hinge rigidity, and mid‑trap density with every dead‑stop rep.

    Setup: Feet hip‑width. Hip‑hinge until torso is parallel to the floor. The bar must settle dead on the ground between reps.

    Execution: Explode the bar into the lower sternum while freezing the chest. Reset completely—no bounce, no torso lift.

    Pro Cue: Rip, freeze, reset. This mantra keeps the lumbar neutral and eliminates momentum.

    Common Errors: Rounding the lumbar spine, bouncing the bar, or cutting the range short.

    Programming: 4 sets × 5–8 reps at 70–80 % of bench‑press 1 RM with two‑minute rests.

    Variation: Single‑arm landmine rows add a rotational‑core challenge while sparing the lower back.

    Pendlay rows generate 11 % more concentric force than classic bent‑over rows (Journal of Strength & Conditioning Research, 2024).

    #3 Y‑Raises

    Purpose: Isolate lower traps and serratus anterior, two muscles that guide healthy overhead mechanics and scapular upward rotation.

    Setup: Set a bench to 30 °. Use 2–5 lb plates—ego ruins the movement. Thumbs stay up to maintain external rotation.

    Execution: Raise arms into a “Y,” squeeze blades down, hold two counts, then lower for three seconds with full control.

    Pro Cue: Keep your nose one inch off the pad. This locks the cervical spine and wards off neck extension.

    Common Errors: Grabbing heavy plates, jerking through the top, or arching the low back.

    Programming: 3 sets × 15 reps, 45‑second rest. Pair with band W‑raises for complete cuff activation.

    Variation: Standing cable Y‑Raises provide constant tension and suit home gyms with cables.

    A six‑week Y‑Raise protocol slashed overhead‑pain scores by 28 % (Clinical Biomechanics, 2023).

    #4 Inverted Rows

    Purpose: Body‑weight horizontal pull that grooves scapular rhythm, lights the lats, and forces total‑body tension.

    Setup: Place a bar at hip height or rings waist‑high. Heels on floor, body locked in a rigid plank.

    Execution: Row the sternum to the bar, squeeze blades hard, then lower under a two‑second negative. Elevate feet when 12 pristine reps are easy.

    Pro Cue: Row your chest, not your chin. Prevents neck craning and shifts work to the mid‑back.

    Common Errors: Sagging hips, half reps, speed‑repping the eccentric.

    Programming: 4 sets × 10–12 reps, 90‑second rest. Use a density goal—50 total reps in minimum time—for variety.

    Variation: Suspension‑ring rows add instability, forcing micro‑adjustments that hard‑wire scapular control.

    Novices added 15 % to pull‑up max in eight weeks of inverted‑row progression (International Journal of Exercise Science, 2021).

    #5 Farmer’s Carries

    Purpose: Forge isometric upper‑back endurance, granite grip strength, and trunk anti‑flexion under heavy load.

    Setup: Grab kettlebells or a trap‑bar loaded to roughly 50 % body‑weight per hand. Stand tall with shoulders depressed and ribs stacked.

    Execution: Walk 30–40 m at a controlled cadence, blades in back pockets, exhaling through the nose every third step.

    Pro Cue: Pretend you’re pinching wallets under your armpits. Keeps scapulae depressed and neck long.

    Common Errors: Shrugging traps to the ears, leaning back like a strongman showboat, or sprinting the distance.

    Programming: 4 carries × 30 m, 90‑second rest. Progress by raising load to 70 % BW, then shortening rest intervals.

    Variation: Single‑arm suitcase carries introduce anti‑rotation torque, lighting up the obliques and QL.

    Loaded‑carry cycles increased lumbar‑spine endurance 21 % in eight weeks (Spine Journal, 2020).

    Training Split Placement for Each Movement

    Each of the five exercises fits a specific phase in your weekly upper-body layout. Slot them strategically to avoid redundancy, maximize adaptation, and support the core goals of posture, pulling strength, and scapular health.

    Face Pulls – Plug into late Pull Day as an activation finisher or pair with push-day pressing as a corrective superset.
    Pendlay Rows – Early Pull Day staple. Treat like your primary compound—high load, high rest, strict form.
    Y-Raises – Put at the end of Pull Day or early on a prehab/mobility-focused accessory day. Ideal as part of a superset.
    Inverted Rows– Mid-Pull Day bodyweight bridge or warm-up to vertical pulling. High volume sets make a strong contrast to weighted rows.
    Farmer’s Carries – Use on Leg Day or Grip/Conditioning Day to avoid postural fatigue overlap. Can also cap Pull Days for loaded carry finishers.

    Weekly Split (Sample Push / Pull / Legs)


    DayKey Work
    MonPull: Pendlay • Face Pull • Inverted Row • Y‑Raise finisher
    TueConditioning (sled drags, carries) + mobility
    WedPush: Heavy bench • incline DB press • serratus press
    ThuActive recovery (breathing drills, cat‑cows, wall slides)
    FriLegs & Carries: Trap‑bar DL • heavy Farmer’s Carry • prowler pushes
    SatSparring / Grappling (apply new posture/pull strength)
    SunRest & soft tissue

    Micro‑progression: Add 2.5 kg to Pendlay each Monday. Deload one week after three increments, then restart.


    10 Common Mistakes & Quick Fixes

    Even the right exercise becomes useless—or worse, injurious—if done with sloppy setup, sequencing, or intent. Below are the ten most common errors lifters make when programming or executing upper-back training, and how to immediately clean them up.

        1.  
        2. Machine-only rows as your main pull – Machines lock you into fixed paths, killing stabilizer activation and scapular freedom. Free weights force full-range scapular motion and trunk engagement. Use machines only after your primary pulling is complete.

        3. Speedy eccentrics that waste hypertrophy windows – Most lifters yank and drop each rep, missing the tension needed to grow. Tempo matters: take three full counts to lower the weight, especially on accessories like Face Pulls or Inverted Rows.

        4. Grip failing before your back does – When your hands give out early, your mid-back stops adapting. Chalk up first. Then, if you must, use straps only on the final set or on your heaviest carries and rows.

        5. Shrugged carries that torch your traps and fry your neck – Farmer’s Carries build posture—but only if you cue shoulders down and back. If your traps burn out early, your scapulae are too elevated. Drop 10–15 % load and rebuild cleaner control.

        6. Loose Y-Raise setup that cheats everything – Arching your back, flaring ribs, or letting your head lift shifts the load away from the lower traps. Press your pelvis into the pad, keep ribs locked, and lead with thumbs—perfect form wins this isolation lift.

        7. Skipping scapular protraction work – Most programs hammer retraction but ignore protraction. This imbalance leads to shoulder instability, scapular winging, and poor serratus function. Include push-up-plus, wall slide reaches, and controlled scapular push-ups to restore full scapular range.

        8. Program stacking that overloads the same angle – Too many rowing variations in one day overfatigue the same muscle fibers. Mix vertical and horizontal pulls, and alternate high/low elbow paths to build full-back density without burnout.

        9. Neglecting breathing mechanics – Upper back and thoracic positioning directly influence breathing capacity. If you train posture without training breath, you limit results. Cue nasal inhales and rib-cage expansion during all carries and rows.

        10. Using traps to row instead of lats and mid-back – Many lifters shrug rows into place instead of pulling with scapular depression and elbow drive. Reset your shoulder blades at the bottom of each rep and avoid initiating with traps.

        11. Inconsistent row tempo across sets – Starting with good form then rushing the final sets erases gains. Maintain tempo across all sets, and film yourself if needed to audit consistency.

    What’s Your Ideal Workout Training Split?

    1. How many days per week can you reliably train?

    2. What’s your main training goal right now?

    3. How do you prefer to allocate your gym time?

    4. What best describes your recovery capacity?

    5. How structured do you need your program?

    6. Which energy system focus appeals most?

    Male athlete performing knuckle pushups next to a loaded barbell during strength conditioning.
    Real strength is built through consistency—your split should fuel better movement, not just muscle size and hit the strong grip benchmark, turning your grip training into undeniable hand power.

    In Closing…

    A powerful upper back is the cornerstone of every lift, strike, and breath. When rear delts, traps, and rhomboids contract in perfect sync, bars track tight lines, punches crack with authority, and lungs pull richer air. Run the five drills above at the prescribed volume, tempo, and frequency; progress loads methodically; and log carry tonnage, dead‑hangs, and posture photos as proof points. Within eight weeks you’ll stand taller, pull heavier, and breathe easier. Own these upper back workout exercises—and no barbell, opponent, or desk chair will make your spine bow again.

    FAQ Section


    Face Pulls, Y-Raises, and Farmer’s Carries top the list. They directly target the scapular stabilizers and thoracic extensors responsible for upright alignment.


    Use bodyweight inverted rows under a sturdy table, resistance band face pulls, and backpack-loaded carries. These can train all scapular planes effectively from home.


    Exercises like Y-Raises, Face Pulls, and tall-kneeling rows enhance scapular upward rotation and posterior cuff endurance—two keys to injury-free pressing.


    Hit upper back 2–3 times per week with 12–16 total working sets. This lets you drive growth while maintaining quality form and recovery.


    Going too heavy on rows, rushing the eccentric, and ignoring scapular mechanics. Form breakdown kills back tension—clean execution beats more weight.

    Resources

    coachjohanncscs.com only uses primary research and scholarly studies as references over secondary sites. Other references are primarily from reputable social media accounts of experts only in the fields of health, nutrition, sports science, physiology, psychology, and physical therapy.